In this post I want to share with you how I did the humidity measurement in my bathroom.
Because I already have 1-Wire buses all over my house measuring temperatures (DS18B20), sensing my switches (DS2413) and controlling relays (DS2408), so logical step was to measure the humidity also using the 1-Wire bus.
I used the Google and found out that a solution was available:
http://rants.dyer.com.hk/rpi/humidity_1w.html
Allan, here I want to thank you for your helpful article and support 🙂
I also found similar projects using DS2438 here:
http://www.phanderson.com/rh166/rh166.html
http://archives.sensorsmag.com/articles/0501/34/main.shtml
https://www.mrsoft.fi/humi.htm
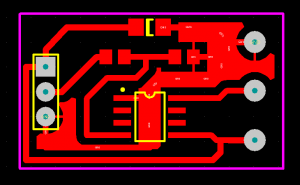
As usual I examined all schematics, chosed the Allan’s one and customized it a bit:

As you can see I decided to use a HIH-4000-003 instead of HIH-5030-001.
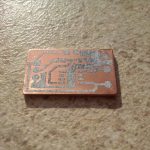
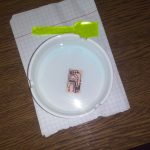
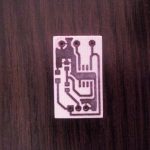
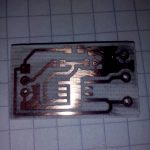
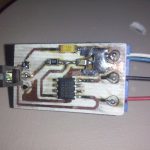
Using the toner transfer method I created and assembled the board:
I connected all needed wires (GND, 1wire and +5V) and made first tests on my desk.
I had to use OWFS (for the first time! 😉 ), because there was no kernel module for DS2438 at that time.
The DS2438 device was properly discovered on the bus, so I started to read a configuration register and measure some values.
It was working correctly!
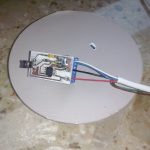
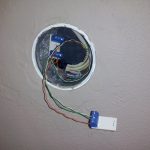
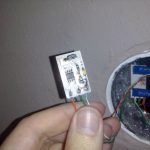
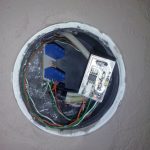
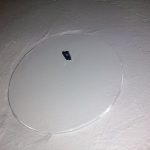
Finally I installed the sensor in the target location, in my bathroom:
To be able to measure the real humidity in %RH, I have to obtain these values:
– supply voltage (VDD)
– A/D voltage from the HIH (VAD)
– temperature (DS2438 has built-in temperature sensor)
The formula is in the HIH-4000 series datasheet.
The last problem to solve was to obtain these values from DS2438 on my Raspberry Pi. I have customized Linux environment running on the Pi, so of course I will not run OWFS on it.
Allan Dyer is sharing on his page a perl script which is doing the measurement using the generic rw sysfs file, but according to him, it is very slow (~26 seconds per single measurement).
Obviously this was unacceptable in my application, so I just did what I was planning from the beginning: writing own kernel module for DS2438 🙂
At the time of writing this post, my patches are approved and waiting for next merge window to be upstreamed. If everything goes according to the plan, the module should be available in kernel 4.12.
One way or another, I am currently using this module on my Raspberry Pi. Measuring the voltages and temperature is as easy as reading the sysfs files. Then I am just calculating a real humidity value from the userspace:
I am also clearing the IAD configuration bit to 0 (once at system start), because I don’t need the DS2438 to measure current A/D data and shadow it to the EEPROM (it is doing this by default).
Now I am finally able to control the fan in my bathroom basing on the humidity value 🙂
Watching the humidity in the Grafana is also nice thing to have:

I was wondering if you are running the HIH-4000 at 3.3V ? The spec sheet states 4V minimum. ( calibrated at 5V @ 25C ) I have built the circuit and
can say it does work, but I’m wondering if I should be running my 1-wire bus at 5V not 3.3…
-T
Hi Tom,
No, I am running the HIH-4000 at 5V (you can see that in the schematic I provided). Currently the DS2438 is telling me that it has 5.05V.
The 3.3V is the 1-wire signal line (DQ) connected to the DS2438, and it is working OK in this configuration. In the same way (5V power supply, 3.3V DQ line) I am using DS18B20 thermometers.
I see… so you run the sensors at 5V, but kept the DQ line at 3.3V .. I’m also using DS18B20 temp sensors. I will try powering them and the DS2438 with 5V and keeping the DQ line at 3.3V and see how that works. I’m using the GPIO pin on the Pi to read the 1-wire. I will just use a pull-up to 3.3V on the DQ line and power the sensors with 5V.
Any chance I can get a copy of your DS2438 kernel module ? Perhaps I can build it for
my kernel and use that instead of the script. The script takes far too long to read the
sensor.. .
Of course! The module is currently waiting for the kernel 4.12 merge window open (this weekend). It is now in Greg’s tree:
https://git.kernel.org/pub/scm/linux/kernel/git/gregkh/char-misc.git/tree/drivers/w1/slaves?h=char-misc-next
I was able to pull the source for the Pi I had running ( 4.4.50 ) and merge your 1-wire changes into it. I built it and …
pi@raspberrypi:~ $ sudo modprobe w1_ds2438
pi@raspberrypi:~ $ lsmod
Module Size Used by
w1_ds2438 3285 0
cfg80211 438846 0
rfkill 16728 1 cfg80211
evdev 11567 1
snd_bcm2835 20452 0
snd_pcm 77514 1 snd_bcm2835
snd_timer 19782 1 snd_pcm
snd 53840 3 snd_bcm2835,snd_timer,snd_pcm
bcm2835_gpiomem 3147 0
bcm2835_wdt 3434 0
w1_gpio 3008 0
wire 26063 2 w1_gpio,w1_ds2438
cn 4754 1 wire
uio_pdrv_genirq 3202 0
uio 8416 1 uio_pdrv_genirq
ipv6 352477 30
I will give it a try this weekend. The sensor I built with the 2438 is at my office … Thanks
for your help.
Nice! 🙂
btw: you can find a brief module explanation here in the kernel doc:
https://git.kernel.org/pub/scm/linux/kernel/git/gregkh/char-misc.git/plain/Documentation/w1/slaves/w1_ds2438?h=char-misc-next
Thanks Manio,
I read the document and have got the humidity sensor working just fine. I can
read the temperature, vad and vdd files easliy. One issue is that I cannot write
to the iad file. The file is rw-rw-rw , but if I try to echo 0 to it I get a response
file too large response.
pi@casamon:/sys/bus/w1/devices/26-00000125e278 $ echo 0 > iad
-bash: echo: write error: File too large
Tom
Tom,
Try echo -n. From the manual:
-n do not output the trailing newline
Otherwise it is trying to write ‘0’ and 0x0a (new line) afterwards.
You can check if it was successful by fetching the page0 and check that IAD bit is cleared (the bit and byte position is in datasheet).
Ugh … why didn’t I think of that… Yes that worked.
Manio, is there any guide of how to build this for the current 4.9 kernel of raspbian?
Roy, I was using this tutorial:
http://lostindetails.com/blog/post/Compiling-a-kernel-module-for-the-raspberry-pi-2
Hi, Question: should this kernel module also work for HIH poping up as A6_ ??? i see the device if is connect it to the one-wire DS2482-800 and can load the w1_DS2438 but the device is not recognized
lrwxrwxrwx 1 root root 0 Dec 10 22:04 28-0316b52a16ff -> ../../../../devices/w1_bus_master5/28-0316b52a16ff
lrwxrwxrwx 1 root root 0 Dec 10 22:04 28-0316b52a8fff -> ../../../../devices/w1_bus_master5/28-0316b52a8fff
lrwxrwxrwx 1 root root 0 Dec 10 22:04 28-0416c1081aff -> ../../../../devices/w1_bus_master4/28-0416c1081aff
lrwxrwxrwx 1 root root 0 Dec 10 22:04 28-0416c13bb0ff -> ../../../../devices/w1_bus_master4/28-0416c13bb0ff
lrwxrwxrwx 1 root root 0 Dec 10 22:04 28-0416c1dc07ff -> ../../../../devices/w1_bus_master5/28-0416c1dc07ff
lrwxrwxrwx 1 root root 0 Dec 10 22:04 28-0416c1ef86ff -> ../../../../devices/w1_bus_master5/28-0416c1ef86ff
lrwxrwxrwx 1 root root 0 Dec 10 22:04 28-0516b45885ff -> ../../../../devices/w1_bus_master4/28-0516b45885ff
lrwxrwxrwx 1 root root 0 Dec 10 22:04 28-0516b4d1f6ff -> ../../../../devices/w1_bus_master4/28-0516b4d1f6ff
lrwxrwxrwx 1 root root 0 Dec 10 22:04 28-0516c0273bff -> ../../../../devices/w1_bus_master4/28-0516c0273bff
lrwxrwxrwx 1 root root 0 Dec 10 22:04 a6-500000871a51 -> ../../../../devices/w1_bus_master5/a6-500000871a51
191.513509] i2c i2c-1: new_device: Instantiated device ds2482 at 0x1c
[ 192.895863] w1_master_driver w1_bus_master5: Family a6 for a6.500000871a51.aa is not registered.
[
Hi Georg,
First of all it is not the HIH which is popping, but the DS2438 chip. I quickly found two articles about similar problem as yours:
https://www.mikrocontroller.net/topic/408168
https://www.mikrocontroller.net/topic/186190
You probably bought the china clone, not the original DS2438 chip – so this is the reason why it is showing as 0xA6 family, not the official 0x26. If it is compatible with DS2438 then the simple method is compile your own module with changed family code (for your own use).
Hello manio,
your wrote “is as easy as reading the sysfs files. Then I am just calculating a real humidity value from the userspace.” –> can you please share your knowlage with us and provide an tutorial / source code.
Thank you
BR
.:Chris:.
Chris, post updated 🙂
Hello manio,
your script was not returning a result. Therefore I added some lines and found out that the program quits in line
fp = fopen(“/sys/bus/w1/devices/26-0000018d4fla/temperature”, “r”);
if (!fp)
printf(“fail to open temperature\n”);
lsmod shows “w1_ds2438”
any idea?
try this:
cat /sys/bus/w1/devices/26-0000018d4fla/temperatureis it working?
Hi,
no, it’s not working:
cat: /sys/bus/w1/devices/26-0000018d4fla/temperature: Datei oder Verzeichnis nicht gefunden
Any idea?
Hardware problem? If you don’t have this file then the slave device on your 1wire bus is not working. Are you sure you have a main module for your 1wire loaded? Do you have other slaves visible, like eg DS18B20? Loaded ds2438 module only add a support for the device family, but if your 1wire bus can’t see the device it would not help.
Hi,
thanks for that useful post. I had a question. Is it possible to use DS2438 as an ambient temperature sensor (as it has integrated temp sensor), so that one coud have temp & humidity sensor in one? Thanks in advance
Of course – when you measure humidity you need to obtain the temperature – so you have all information with single run, look at the above sample code… 🙂
Hi Manio,
is your driver included in last raspbian? I would like to use it in my project.
Yes, it is 🙂