Hi! As I sometimes have odd behavior with my Raspberry Pi (the USB/LAN is stopping working, while the whole raspberry does still work), I had to find out the method to debug this specific problem. Connecting HDMI display and a keyboard in place where I have it running would be problematic (besides - the USB keyboard also may not work if there are indeed USB problems), so a obvious choice was the UART connection in the Raspberry. In such cases I am generally soldering own connection to my old MAX3232 unit. This time I decided to buy dedicated board on ebay. Nowadays it is very cheap, universal (5V/3.3V jumper) and has dedicated PIN header for easy wiring. Last but not least - it also has a nice power/activity LEDs which are very useful. So overall - this was great advantages over my test board and it has the original FTDI chip! :)
I ordered this one from ebay:

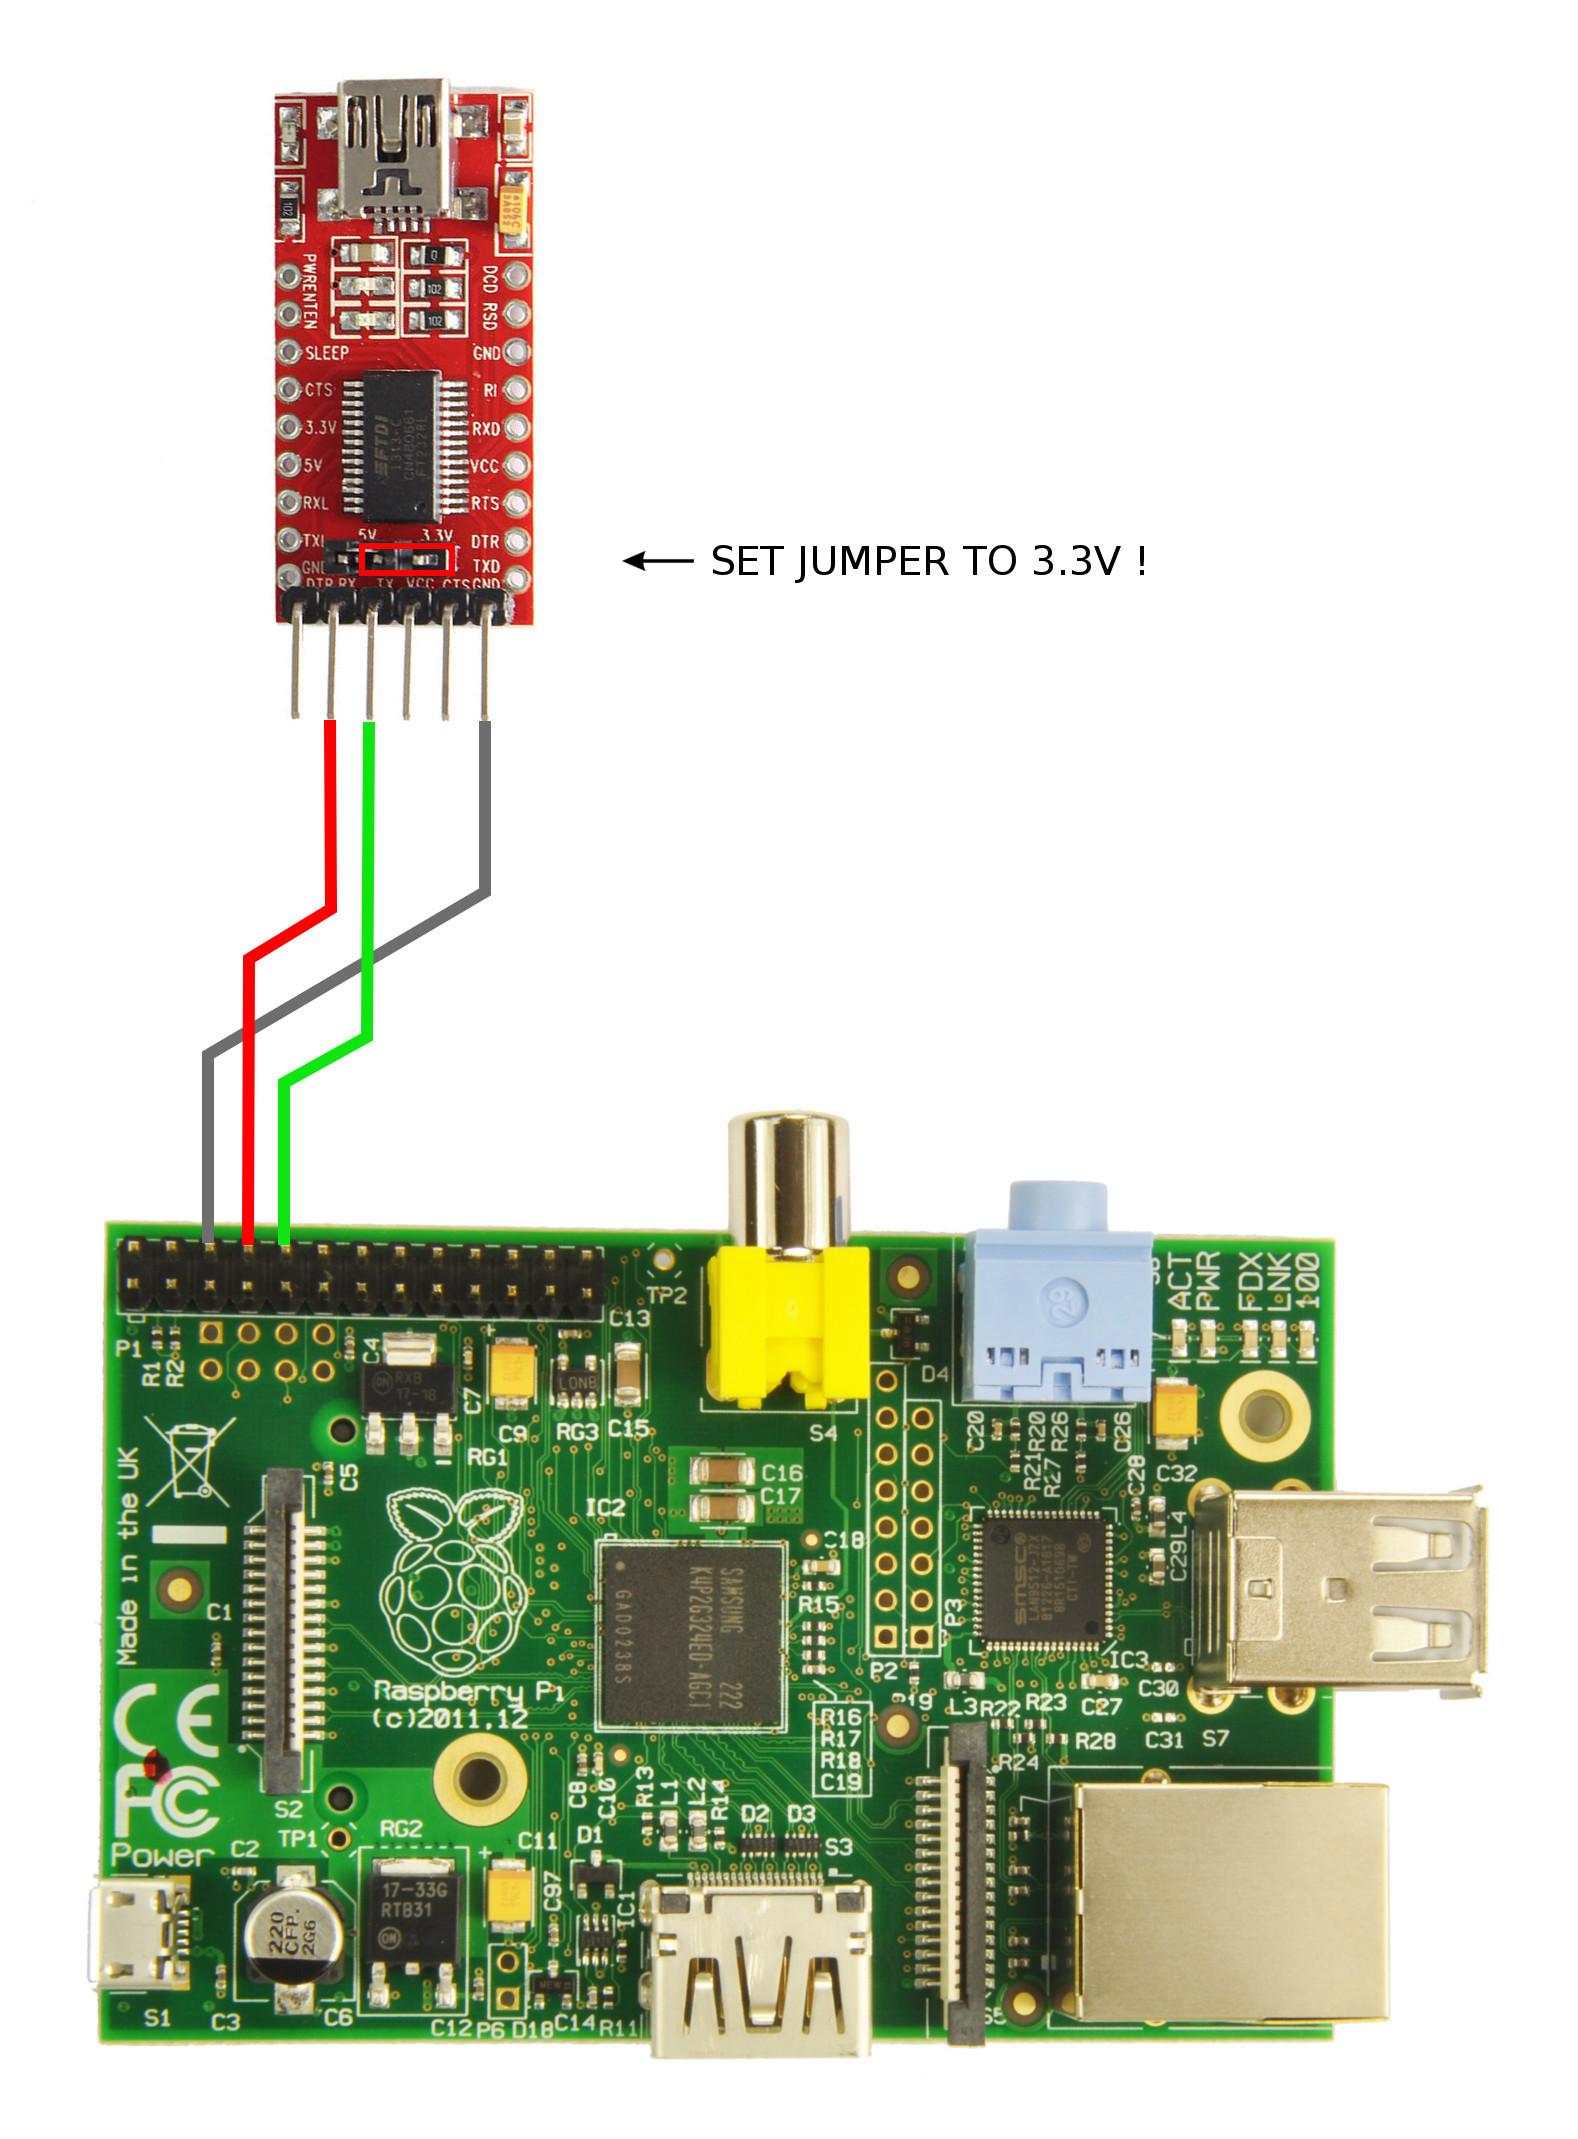
After physically connection I’ve make sure that my / boot/commandline.txt is properly configured. As of time of writing I have default values from the Raspbian which are:
console=serial0,115200 console=tty1This has to be sufficient to receive kernel debug logs over the serial connection.
After realizing that the onboard connector is a Mini-USB, not a Micro-USB (yes, it matters ;) ) and after connecting the cable from my old Motorola RIZR Z8, I was ready for testing :) The FTDI device was successfully detected on my laptop and the /dev/ttyUSB0 was assigned. I’ve run the minicom like this:
minicom -b 115200 -o -D /dev/ttyUSB0And I was able to see the kernel logs when the Pi was booting up! So at least my RX line is working correctly :)
As my Raspberry is stripped down to fit in RAM, I had to manually enable getty on the serial connection to be able to use the serial port as a console terminal. For test I was trying to run it like this:
getty -L ttyAMA0 115200 vt100 -n -l /bin/shBut I’ve only got:
getty: setsid: Operation not permittedAfter googling for the similar problem I finally found this: https://unix.stackexchange.com/questions/196704/getty-start-from-command-line And this was the problem, I had to run it like this:
su root -c "getty -L ttyAMA0 115200 vt100 -n -l /bin/sh"Now I have a prompt on my serial connection. One step forward :)
But wait… when I press enter/other characters in minicom - nothing happened… The final solution was Ctrl-A, O ( cOnfigure minicom), and I had to disable Hardware Flow Control (F) Then all buffered characters was sent immediately :)
Console cable is now working in both directions, so I have a working debug solution for my RPi! :)